In the ever-evolving world of beauty, trends come and go, but the desire for voluminous, bouncy curls remains constant. While curling irons and wands have dominated the last decade, there is a massive resurgence happening in the world of rollers and curlers. Thanks to social media tutorials and a return to the “supermodel blowout” look of the 90s, these classic tools are back in the spotlight—and for good reason.
Rollers and curlers offer something that a standard curling iron often cannot: incredible volume at the root, long-lasting hold, and a variety of styling options that range from heat-free to high-heat. Whether you are looking to protect your hair from damage with satin curlers or achieve a red-carpet-ready look with hot rollers, understanding the different tools available is the first step to hair perfection. This comprehensive guide will break down every type of roller, how to use them, and which one is right for your hair type.
Why Choose Rollers Over Curling Irons?
Before diving into the specific types, it is important to understand why you might reach for a set of rollers instead of your trusty wand.
Volume, Volume, Volume
The primary benefit of using rollers is the lift they provide. By winding the hair all the way to the scalp and letting it set (cool down or dry) in that position, you create a structural lift at the root that is difficult to achieve with an iron alone. This is the secret to that salon-quality blowout look.
Hair Health
Many types of rollers and curlers are designed for heatless styling. This is a game-changer for individuals with bleached, damaged, or fine hair who want to avoid the frying effects of hot tools. Even hot rollers often use less intense, direct heat than a 400-degree curling wand.
Hands-Free Styling
Once the rollers are in, your hands are free. You can do your makeup, drink your coffee, or get dressed while your hair sets. It is a multitasking beauty hack that saves active styling time.
The Different Types of Rollers and Curlers
Navigating the hair aisle can be overwhelming. Here is a breakdown of the most popular tools and what they do.
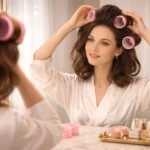
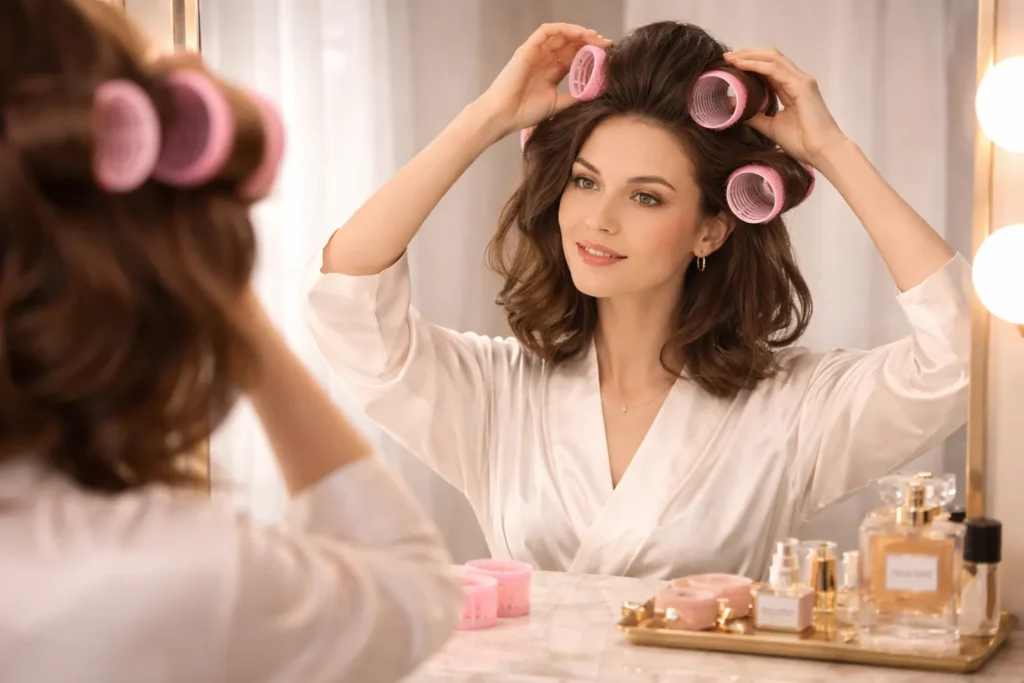
1. Velcro Rollers
These are the icons of the roller world. They are hollow plastic cylinders covered in a velcro-like material that grips the hair without the need for clips or pins (though clips are recommended for heavy hair).
- Best For: Volume and smoothing. They don’t create tight curls but rather big, bouncy waves and “fluffy” blowouts.
- How to Use: Apply to warm, freshly blow-dried hair. Let the hair cool completely in the roller before removing.
- Hair Type: Great for all hair types, but especially fine hair that needs grip.
2. Hot Rollers
These electric sets come in a case that heats the rollers up. They are usually made of ceramic or flocked plastic to protect the hair.
- Best For: Long-lasting curls and speed. They set the curl quickly with heat and cool down to lock it in.
- How to Use: Roll dry hair onto the heated rollers and secure with the included clips. Wait until they are completely cool to remove.
- Hair Type: Excellent for thick or resistant hair that struggles to hold a curl.
3. Flexi Rods (Bendy Rollers)
These are long, flexible foam rods that can be bent into any shape. They require no pins or clips.
- Best For: Tight, spiral curls and ringlets. The diameter of the rod determines the tightness of the curl.
- How to Use: Wrap damp or dry hair around the rod and bend the ends to secure. Sleep in them or let air dry.
- Hair Type: Great for natural textures and curly hair patterns.
4. Satin/Silk Heatless Curlers
The viral sensation of recent years. This is usually a long, sausage-like tube made of foam covered in satin.
- Best For: Comfortable overnight styling and loose, beachy waves.
- How to Use: Place the ribbon on top of your head and wrap damp hair around it like a french braid. Secure with scrunchies and sleep.
- Hair Type: Perfect for long hair and anyone prone to breakage.
5. Magnetic Rollers
Don’t be fooled by the name; they aren’t actually magnetic. They are hard plastic rollers that hold wet hair tightly in place with a snap-on cover.
- Best For: Very smooth, crisp curls and setting wet hair (wet sets).
- How to Use: Roll wet hair with setting lotion and sit under a hooded dryer.
- Hair Type: Often used on textured or natural hair to stretch and smooth the curl pattern.
6. Sponge/Foam Rollers
The classic “grandma” roller. Soft foam with a plastic clip attached.
- Best For: Sleeping comfortably. The soft foam squishes down when you lay your head on the pillow.
- How to Use: Roll damp hair and snap the clip shut.
- Hair Type: Good for all types, but can cause crimps or dents if the plastic clip isn’t positioned correctly.
How to Choose the Right Size
Size matters when it comes to rollers and curlers. The diameter of the roller dictates the final look.
- Small Rollers (0.5 to 1 inch): Create tight, springy curls. Use these if you want a poodle look, spiral curls, or if you have very short hair.
- Medium Rollers (1 to 1.5 inches): Create classic curls and waves. This is the most versatile size for shoulder-length hair.
- Large/Jumbo Rollers (2 inches and up): Create volume and a slight bend at the ends. These are for the blowout look, not for creating ringlets. Use these at the crown of your head for maximum lift.
Step-by-Step: The Perfect Velcro Roller Blowout
Achieving that 90s supermodel look is easier than you think. Follow this routine for salon-worthy results.
Step 1: Prep the Hair
Start with clean, damp hair. Apply a volumizing mousse to the roots and a heat protectant through the lengths. The mousse provides the “guts” your hair needs to hold the volume.
Step 2: Rough Dry
Use your blow dryer to get your hair about 80-90% dry. You don’t want it soaking wet, or it will never dry inside the rollers.
Step 3: Section and Smooth
Section off the “mohawk” area (top of your head) first. Take a section of hair no wider than the roller itself. Using a round brush and your blow dryer, smooth this section until it is hot and dry.
Step 4: Roll It Up
While the section is still hot, immediately wrap it around the velcro roller. Roll away from your face for a windswept look. Secure with a duckbill clip at the base to prevent it from flopping over.
Step 5: Continue Downward
Repeat this process on the sides and back. For the sides, roll downward or away from the face. For the back, roll under.
Step 6: The Cool Down
This is the most crucial step. Leave the rollers in until they are completely cool to the touch. This usually takes 15-20 minutes. You can blast them with the “cool shot” button on your dryer to speed this up. Cooling “sets” the hydrogen bonds in the hair, locking in the shape.
Step 7: Unravel and Style
Gently remove the clips and unroll the hair—do not pull! Shake your head upside down, run your fingers through the curls to break them up, and finish with a flexible hold hairspray.
Heatless Styling: Saving Your Strands
If your goal is to rehabilitate damaged hair, rollers and curlers designed for heatless styling are your best friends.
The Art of the Wet Set
Using magnetic or flexi rods on wet hair creates the most durable curl. Because the hair transitions from wet to dry in the curled shape, the hydrogen bonds reform strongly.
- Tip: Use a setting lotion or a lightweight curl cream. This ensures the curl is polished and frizz-free, not fluffy and undefined.
- Drying Time: Be patient. If you take the rollers out while the hair is even slightly damp, the curl will fall flat within an hour.
Sleeping in Rollers
The biggest challenge with overnight curls is comfort.
- Use a Silk Bonnet: If you are using satin heatless curlers or flexi rods, cover your hair with a silk bonnet. This keeps the curlers in place and prevents friction frizz from your pillowcase.
- Placement Matters: Try to position rollers on the top of your head (like a high pineapple) rather than the sides, so you can sleep on your side comfortably.
Troubleshooting Common Roller Mistakes
Even with the best tools, things can go wrong. Here is how to fix common issues with rollers and curlers.
“My curls fell out immediately.”
- Cause: You likely took the rollers out too soon (while the hair was still warm or damp) or didn’t use enough product.
- Fix: Ensure hair is 100% cool and dry. Use a mousse before styling and a hairspray after.
“I have a weird dent or crimp in my hair.”
- Cause: The clip was placed incorrectly, or you rolled the hair too loosely.
- Fix: When using clips, place a piece of tissue paper between the clip and the hair to buffer the pressure. Ensure tension is high when winding the hair.
“My hair got stuck in the velcro.”
- Cause: You rolled too much hair onto one roller, or your hair is very damaged/tangled.
- Fix: Take smaller sections. Ensure hair is thoroughly detangled before rolling. Unroll slowly and carefully—never yank.
“The volume is too crazy.”
- Cause: You rolled too high on the base (directly on top of the root).
- Fix: Pull the roller down slightly or wait for gravity to do its work. Volume usually settles after an hour.
Care and Maintenance of Your Tools
To keep your rollers and curlers working effectively, you need to keep them clean.
- Velcro Rollers: These trap loose hair and dust. Pull the hair out after every use. Once a month, soak them in warm soapy water and scrub with an old toothbrush to remove product buildup.
- Hot Rollers: Wipe down the ceramic or velvet surface with a damp cloth to remove hairspray residue. Ensure the unit is unplugged and cool first.
- Sponge/Satin Rollers: Most foam and fabric rollers can be hand-washed with gentle detergent and air-dried.
Conclusion: Embracing the Roller Renaissance
The revival of rollers and curlers proves that some beauty techniques are timeless. Whether you are chasing the elusive volume of a 90s supermodel, trying to grow out heat-damaged hair, or simply want a style that lasts for days, there is a roller set out there for you.
By understanding your hair type and choosing the right diameter and material, you can transform your styling routine. It requires a little practice—and perhaps a bit of patience during the cool-down phase—but the result is healthy, bouncy, luxurious hair that commands attention. So, dust off that set of hot rollers or order that viral heatless ribbon; your best hair day is just a roll away.
Frequently Asked Questions (FAQs)
Q1: Do hot rollers damage hair as much as curling irons?
A: Generally, no. Hot rollers typically use a lower temperature than curling irons (which can reach 400°F+). Also, the heat is diffuse rather than direct and concentrated. However, frequent use of any heat can cause dryness, so always use a heat protectant.
Q2: Can I use velcro rollers on dry hair?
A: Velcro rollers work best on hair that has been warmed up. If your hair is bone dry and cold, the roller won’t do much. You should heat the section of hair with a blow dryer or curling iron first, then wrap it in the velcro roller to cool and set.
Q3: How long should I leave rollers in?
A: For heat styling (hot rollers or velcro with a blow dryer), leave them in until they are completely cool to the touch (15-30 minutes). For wet sets or heatless styling, they must stay in until the hair is 100% dry, which can take several hours or overnight.
Q4: Which rollers are best for short hair?
A: Small to medium-sized velcro or hot rollers are great for short hair. They provide lift at the root and a nice bend at the ends. Avoid jumbo rollers, as the hair won’t be long enough to wrap around them effectively.
Q5: How do I stop the rollers from falling out?
A: Tension is key. Wrap the hair tightly around the roller. If using velcro rollers, secure them with a metal duckbill clip at the base (where the roller meets the scalp). For heavy hair, use two clips per roller.
Sofia Bennett is a fashion writer and style observer known for her clean sense of aesthetics and trend analysis. She has covered fashion shows, reviewed designer collections, and interviewed independent creators. Sofia specializes in connecting fashion with real-life lifestyle choices, helping readers understand what looks good — and why.